purple Marble matte tile shower wall
Sep 03, 2025
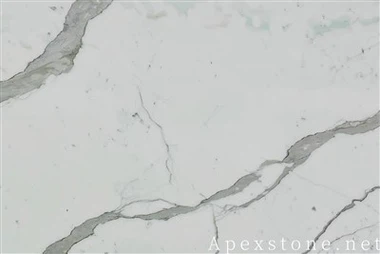
Potential Issues When Installing Royal Lavender Marble Matte Tiles on Shower Walls (Due to Inaccurate Wall Sizes/Angles)
1. Visible gaps & moisture intrusion: Uneven walls (dips, bulges) or out-of-square corners create inconsistent spaces between tiles and walls, or between adjacent tiles. These gaps (even 1–3mm) trap shower water-matte marble is porous, so moisture seeps behind tiles, causing mold, wall rot, or permanent staining on the marble's backside.
2. Crooked tile alignment & unpolished aesthetics: If walls aren't straight or corners aren't 90°, tiles will shift during installation. This leads to uneven grout lines (varying in width), tilted tiles, or a "wavy" wall appearance-ruining the sleek look of the Royal Lavender marble's matte finish.
3. Tile cracking or chipping: Forcing tiles to fit irregular walls (e.g., trimming small, narrow pieces to fill gaps from a bulging wall) stresses the brittle marble. Matte tiles are also more prone to visible chips, as their finish doesn't hide flaws like glossy tiles do.
4. Poor adhesion & tile detachment: Uneven wall surfaces mean adhesive won't spread evenly. Tiles may bond weakly in low-adhesion spots, leading to them popping off over time-especially risky in high-moisture showers.

Key Installation Steps to Fix These Issues
1. Pre-installation wall assessment (critical!):
Use a laser level to check wall flatness-mark any dips/bulges over 2mm. Use a protractor to confirm corner angles (aim for 90°; note "out-of-square" gaps). For shower walls, also ensure the surface is clean, dry, and free of old paint/adhesive-marble needs a smooth base to bond.

2. Fix wall irregularities first:
• Fill dips: Use a moisture-resistant drywall compound (shower-specific, to avoid mold) to fill low spots. Sand smooth once cured.
• Sand bulges: Gently sand down minor wall bumps with fine-grit sandpaper (avoid over-sanding, which creates new dips).
• Shim for major gaps: If corners are drastically out of square, use thin, waterproof backer board shims to build out one side-this creates a straight,
square edge for tiles.

3. Dry lay tiles to plan cuts:
Before applying adhesive, lay tiles on the shower floor (mimicking wall dimensions) to map the layout.
• Avoid tiny tile cuts (<50mm wide)-they're fragile and look unprofessional. Adjust the starting point (e.g., center the largest tiles) to minimize small pieces.
• Mark tiles that need trimming to fit wall edges/corners. Use a wet saw with a diamond blade (only for marble-prevents chipping) to cut tiles; test cuts on scrap pieces first.

4. Apply adhesive & set tiles correctly:
• Use a notched trowel (1/4" or 3/8" size, based on tile thickness) to spread a uniform layer of epoxy or latex-modified thinset adhesive (waterproof, ideal for showers). The notches ensure even coverage.
• Press tiles firmly into the adhesive, using tile spacers (2–3mm) to keep grout lines consistent. Check alignment with a level after setting each tile- adjust immediately if tilted.

5. Seal & grout for moisture protection:
• Seal first: Matte marble is porous-apply a shower-specific, water-based stone sealer to tiles (and grout later) before grouting. Let it dry fully to block water absorption.
• Grout carefully: Use a sanded, mold-resistant grout (color-matched to complement Royal Lavender). Fill gaps with a rubber float, then wipe excess with a damp sponge. Avoid grout on tile edges-matte finish shows residue easily.
• Re-seal: After grout cures (24–48 hours), apply a second coat of sealer to tiles and grout for extra protection.

6. Hire marble tile specialists:
Regular tilers may not handle marble's brittleness or matte finish gently. Experienced marble installers know to:
• Cut tiles without chipping.
• Ensure even adhesion in wet environments.
• Avoid common mistakes (e.g., using non-waterproof adhesive) that ruin shower walls.