green Marble 36 vanity vanity top bathroom
Sep 05, 2025
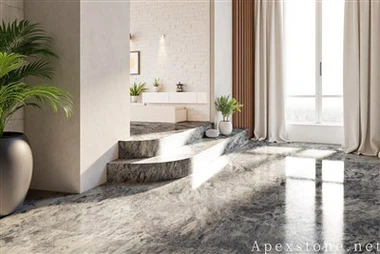
Part 1: Common Issues from Inaccurate Wall Sizes/Angles for a Prada Emerald Marble 36" Vanity Top

A 36" vanity top (standard for single-sink setups) relies on tight alignment with walls and the vanity base-but uneven walls, off-kilter corners (not 90°), or a warped vanity base (from floor irregularities) can cause these problems:

1. Gaps between top and walls: Even 1–3mm gaps (from bulging/concave walls) ruin the sleek look of the Prada Emerald's veining and trap water/grime, risking mold or staining the marble.
2. Misaligned sink cutout: If walls are off-plumb (tilted), the pre-cut sink hole may shift relative to the vanity base-leaving uneven overhangs (e.g., too narrow on one side) or gaps around the sink.

3. Marble cracking/chipping: Natural marble (unlike laminate) is brittle. Forcing a rigid 36" top to fit misaligned walls/corners can crack edges or chip the veined surface, damaging the Prada Emerald's aesthetic.
4. Uneven overhang: The vanity top's standard 1–2" overhang (for comfort) may become inconsistent if the vanity base is uneven (e.g., one leg is shorter). This looks unpolished and can make cleaning hard.

Part 2: Key Steps for Installation
1. Pre-Installation: Fix "Imperfections" First
• Level the vanity base: Place a spirit level on the vanity's top edges. If it's uneven, use plastic shims under wobbly legs to make the base perfectly flat -this ensures the marble top sits evenly (no pressure points that cause cracking).
• Map wall flaws: Use a laser level to check wall straightness. Mark bulges (e.g., a 2mm bump at 12" height) or dips with painter's tape. For non-90° corners, use a protractor to measure the exact angle (e.g., 87° or 93°).
• Request a template (critical!): Send on-site measurements (not just drawings) to the supplier. Ask for a thin plywood/mdf template of the 36" top. Test-fit it on the vanity base and against walls-trim the template to fix gaps before cutting the actual marble.

2. On-Site Fitting: Precision Trimming & Alignment
• Trim for gaps: If the template shows small gaps (<3mm) against walls, use a diamond-tipped saw (for marble) to trim the top's edges slightly-go slow to avoid chipping the Prada Emerald's surface. For larger gaps (3–5mm) from wall bulges, notch the top's back edge to "bypass" the flaw.
• Match corner angles: For non-90° corners, cut the top's corner at a complementary angle (e.g., 87° to fit an 87° wall corner) to eliminate gaps. Use a straightedge to ensure the cut follows the Prada Emerald's veining as much as possible (preserves aesthetics).
• Align the sink cutout: Double-check that the sink hole lines up with the vanity's drain opening. If the base shifted, adjust the top (use shims under one side) until the cutout is centered-mark the position with tape to keep it fixed during securing.

3. Secure & Seal to Prevent Damage
• Use marble-safe adhesive: Apply a thin, even layer of silicone adhesive (not construction glue) to the vanity base-this holds the top in place without damaging the marble. Avoid over-applying (excess glue can seep out and stain veining).
• Seal gaps with color-matched caulk: After placing the top, fill gaps between the marble and walls with clear or green-tinted silicone caulk (match Prada Emerald's hue). Smooth the caulk with a wet finger for a seamless finish-this blocks water and hides minor imperfections.
• Protect edges: Add felt pads under any items (e.g., toothbrush holders) that sit on the top to prevent scratching. For the overhang edges, apply a thin coat of marble sealer (same as used for countertops) to reinforce against chipping.